Harfbuzz and Python
I explored using Harfbuzz which is a text shaping library that is able to read a font file (TrueType font, .ttf) and convert a sequence of Unicode (text) into properly formatted and positioned glyph output. My goal was to create 3D geometry from it, be it flat.
My starting point was using vharfbuzz which made using Harfbuzz look easy. It does indeed provide a user-friendlier way to use Harfbuzz in Python. The thing it brought most to the table for me was the SVG output. It demonstrated the basics of what is possible with the library. The key part is it shows that it can issue a series of draw commands and doesn’t try to rasteriser the text itself. The other thing it does help with is it handles the set-up of the underlying library so I could focus on my initial part.
vharfbuzz is a wrapper over the top of uharfbuzz which is a Cython
bindings for the HarfBuzz. The binding has a few nice minor niceties that make
the library not too C-like, but does take several function calls to setup.
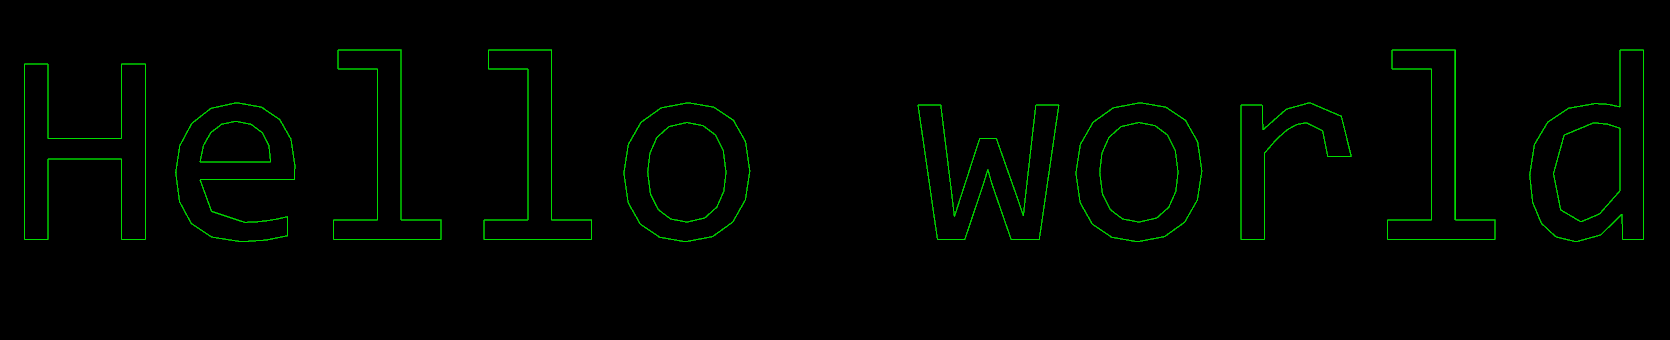
My goal was for each glyph produce generate a series of (X, Y) coordinates that defined a line. In this case most the lines are closed so they form a polygon.
I didn’t fancy having to parse the SVG output and instead looked at providing
my own draw functions to uharfbuzz instead.
The interface that you have to implement is very similar to a path found in various libraries such as Qt, Skia and Canvas. It requires the following five functions:
- Move to
- Line To
- Cubic to
- Quadratic to
- Close path
In this case the uharfbuzz makes it even easier by making the eventual
draw glyph call take as input the object that you with to pass to each of the
functions above.
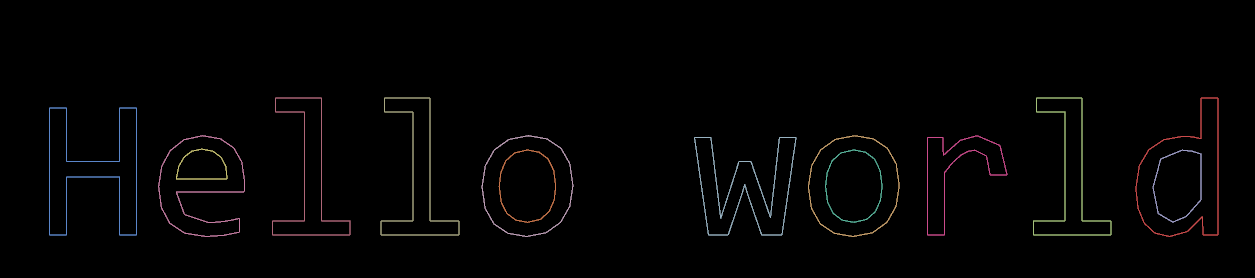
The following shows each path that was produced coloured by a different colour. For the letter e, this shows that the semi-circle shape that is in the top of the letter is handled as a different path, likewise the letter o has an inner and outer circle.
Now that the text was drawn to a state where I was happy with it, I removed
vharfbuzz from the project. This was made possible because I already put in
place enough abstraction that could deal with the several lines of set-up and
I wasn’t using the extra things the former library provides.
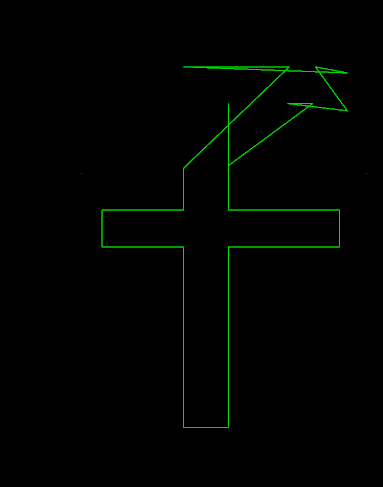
Bézier curves
The top-left of the letter f contained a Bezier curves when shaped. At this point I had simple written out the end point so it goes straight from start to end ignoring the control point.

My initial few attempts failed as seen here:
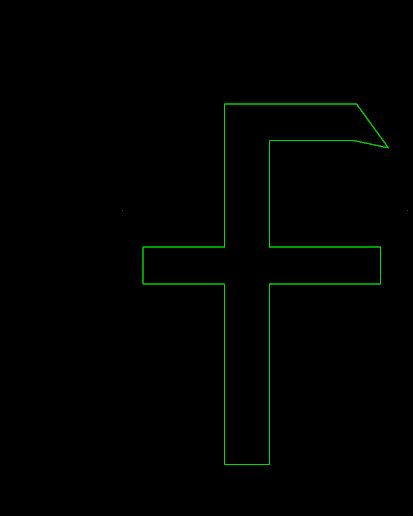
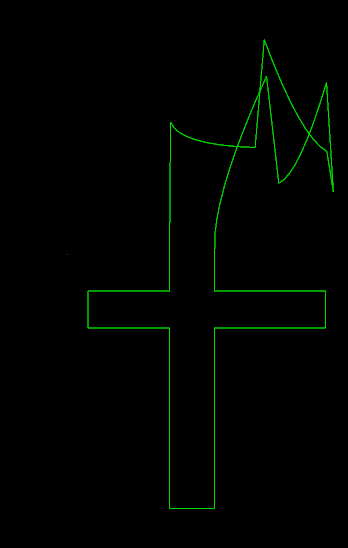
I eventually pin-pointed the cause of this. The inputs to approximating a quadratic Bezier curve is a starting point, a control point and an end point. The problem was my starting point had an offset applied where which wasn’t also applied to the control or end points. Fixing this by subtracting the offset from the first point addressed the issue.
The thing that should have given this away was when I changed my test data to
be the string fffffff and so future along in the sequence the more messed up
it was getting as the offset adding up.
def quadratic_to(c1x, c1y, x, y, lines):
    def bezier_formula_quadratic(start, t):
        start_x, start_y = start
        return (
            (1 - t) * (1 - t) * start_x + 2 * (1 - t) * t * c1x + t * t * x,
            (1 - t) * (1 - t) * start_y + 2 * (1 - t) * t * c1y + t * t * y,
        )

    start_x, start_y = lines.last_point_without_offset
    division = 10
    for i in range(1, division):
        new_x, new_y = bezier_formula_quadratic(
            (start_x, start_y), i / division)
        lines.add_to_current_line(new_x, new_y)
Code
The code can be found in text_to_lines.py my repository called warehouse51. For the version at the time of this blog post that is commit 5da9c942ac.
Skia
Hooking up uharfbuzz to Skia was quite straight forward. This is because
as mentioned before, the draw functions mirror that of a path. So defining
the 5 functions to call the relevant function on a skia.Path object and
then setting up the draw call to pass that in as well as apply the suitable
translations on the skia.Canvas was all it took.
import skia
import uharfbuzz
Draw Functions
def draw_functions():
    """The draw functions calls onto skia.Path functions."""
    def cubic_to(c1x, c1y, c2x, c2y, x, y, path):
        path.cubeTo(c1x, c1y, c2x, c2y, x, y)

    def quadratic_to(c1x, c1y, x, y, path):
        path.quadTo(c1x, c1y, x, y)

    functions = uharfbuzz.DrawFuncs()
    functions.set_move_to_func(lambda x, y, path: path.moveTo(x, y))
    functions.set_line_to_func(lambda x, y, path: path.lineTo(x, y))
    functions.set_cubic_to_func(cubic_to)
    functions.set_quadratic_to_func(quadratic_to)
    functions.set_close_path_func(lambda path: path.close())
    return functions
Render function
The render function creates a canvas, draws the glyphs onto it and then saves it to a Portable Network Graphic (PNG) file.
def render(harfbuzz_font, text: str, destination: str):
    # Setup the text shaper.
    buffer = uharfbuzz.Buffer()
    buffer.add_str(text)
    buffer.guess_segment_properties()
    uharfbuzz.shape(harfbuzz_font, buffer, features=None,
                    shapers=None)

    font_extents = harfbuzz_font.get_font_extents('ltr')
    y_cursor = -font_extents.descender
    x_cursor = 0
    draw_funcs = draw_functions()

    # Start drawing.
    width = sum(position.x_advance for position in buffer.glyph_positions)
    height = font_extents.ascender - font_extents.descender
    surface = skia.Surface(width, height)

    paint = skia.Paint(Color=skia.Color(15, 98, 254), StrokeWidth=2)

    with surface as canvas:
        for info, pos in zip(buffer.glyph_infos, buffer.glyph_positions):
            path = skia.Path()

            harfbuzz_font.draw_glyph(info.codepoint, draw_funcs, path)
            canvas.translate(pos.x_offset, pos.y_offset)
            canvas.drawPath(path, paint)
            canvas.translate(-pos.x_offset, -pos.y_offset)
            canvas.translate(pos.x_advance, pos.y_advance)

            x_cursor += pos.x_advance
            y_cursor += pos.y_advance

    image = surface.makeImageSnapshot()
    image.save(destination, skia.kPNG)
Usage
The following snippet does use the Font class from text_to_lines.py.
if __name__ == '__main__':
    font = Font('consola.ttf')
    render(font.harfbuzz_font, 'Hello World!', 'hello_world.png')
This isn’t too difficult to remove as the following would work:
def load_font(font_path: str):
    # Load the font.
    blob = uharfbuzz.Blob.from_file_path(font_path)
    face = uharfbuzz.Face(blob)
    font = uharfbuzz.Font(face)
    font.scale = (face.upem, face.upem)
    uharfbuzz.ot_font_set_funcs(font)
    return font

if __name__ == '__main__':
    render(load_font('consola.ttf'), 'Hello World!', 'hello_world.png')
Result
The results of running that script is the words “Hello World!” produced
upside down and rasterised by Skia.
